Set up Pipelines
Configure publications, destinations, and Supabase Pipelines.
Public Alpha
Supabase Pipelines is currently in public alpha. Features and behavior may change as we continue developing the product.
Supabase Pipelines is a managed CDC product for moving data from Supabase Postgres to supported destination systems. It uses Postgres logical replication with the open-source Supabase ETL engine. You choose a destination in the Dashboard, and Supabase runs the pipeline that sends database changes to that destination.
Pipelines has two replication phases:
- Initial sync: A one-time copy of the existing rows in the published tables.
- Ongoing replication (CDC): Continuously captures and applies subsequent inserts, updates, deletes, and truncates.
Managed Pipelines run in AWS eu-central-1 (Frankfurt). Choose a destination region as close as possible to Frankfurt to reduce network latency and replication lag.
Pricing#
$0.053 per hour for each configured pipeline. $0.60 per Gigabyte of initial sync data. $3.00 per Gigabyte of ongoing replication data.
| Plan | Configured Pipeline | Initial Sync Data | Ongoing Replication Data |
|---|---|---|---|
| Free | - | - | - |
| Pro | $0.053/hr | $0.60 per GB | $3.00 per GB |
| Team | $0.053/hr | $0.60 per GB | $3.00 per GB |
| Enterprise | Custom | Custom | Custom |
For a detailed breakdown of how charges are calculated, refer to Manage Pipeline usage.
For billing examples and optimization guidance, see Manage Pipelines usage.
Setup overview#
Pipelines requires two main components: a Postgres publication (defines what to replicate) and a destination (where data is sent). Supabase runs the managed pipeline that reads from the publication and writes to the destination. Follow these steps to set up your replication pipeline.
If you already have a Postgres publication set up, you can skip to Step 2: Enable Pipelines.
Step 1: Create a Postgres publication#
A Postgres publication defines which tables and change types will be replicated from your database. You can create a basic publication in the Dashboard while configuring the destination, or use SQL when you need column lists, row filters, schema-wide publications, or other advanced options.
- Dashboard: Continue to Step 2. In Step 3, open the Publication selector, click New publication, enter a name, and select at least one table.
- SQL: Create the publication now using one of the examples below, then select it when you configure the destination.
Creating a publication with SQL#
The following SQL examples assume you have users and orders tables in your database.
Publication for specific tables
1-- Create publication for both tables2create publication pub_users_orders3for table users, orders;This publication tracks all changes (INSERT, UPDATE, DELETE, TRUNCATE) for both the users and orders tables.
Publication for all tables in a schema
1-- Create a publication for all tables in the public schema2create publication pub_all_public for tables in schema public;This tracks changes for all existing and future tables in the public schema.
Publication for all tables
1-- Create a publication for all tables2create publication pub_all_tables for all tables;This tracks changes for all tables in your database.
FOR ALL TABLES includes tables in Supabase-managed schemas, including the internal etl tables that Pipelines creates. Prefer FOR TABLES IN SCHEMA public or list the application tables explicitly unless you intend to replicate every eligible table in the database.
Advanced publication options#
Selecting specific columns
You can replicate only a subset of columns from a table:
1-- Replicate only specific columns from the users table2create publication pub_users_subset3for table users (id, email, created_at);This only replicates the id, email, and created_at columns from the users table.
Filtering rows with a predicate
You can filter which rows to replicate using a WHERE clause:
1-- Only replicate active users2create publication pub_active_users3for table users where (status = 'active');45-- Only replicate recent orders6create publication pub_recent_orders7for table orders where (created_at > '2024-01-01');Partitioned tables
Pipelines follows Postgres publication semantics for partitioned tables. The publish_via_partition_root publication setting controls whether changes from partitions are emitted as the partition root or as the leaf partitions.
| Publication setting | What gets replicated | Destination shape |
|---|---|---|
publish_via_partition_root = true | Rows from the published partition root, including rows stored in its leaf partitions | One table matching the published partition root |
publish_via_partition_root = false | Rows from the leaf partitions under the published partition root | One table per replicated leaf partition |
| Not set in SQL | Same as false, because Postgres defaults publish_via_partition_root to false | One table per replicated leaf partition |
| Publishing an individual leaf partition | The leaf partition itself, regardless of publish_via_partition_root | One table for that leaf partition |
FOR ALL TABLES or FOR TABLES IN SCHEMA | Partition roots plus regular tables when true; leaf partitions plus regular tables when false or unset | Destination tables follow the effective Postgres publication table list |
For example, if orders is partitioned by month:
1-- Replicate the whole partition hierarchy as the parent table.2create publication pub_orders_root3for table orders4with (publish_via_partition_root = true);56-- Replicate each leaf partition as its own table.7create publication pub_orders_leaves8for table orders9with (publish_via_partition_root = false);Use publish_via_partition_root = true when you want analytics queries to read from a single destination table that has the parent table's schema. Use false when each partition should remain a separate destination table.
Publications created from the Dashboard replication flow use publish_via_partition_root = true. If you create or alter a publication manually with SQL, set this option explicitly so the destination shape matches what you expect.
On Postgres 15 and newer, row filters on partition publications apply during both the initial sync and ongoing replication. Pipelines uses the row filter attached to the effective publication table entry: the published partition root when publish_via_partition_root = true, and the published leaf relation when publish_via_partition_root = false.
The publication setting controls which Postgres relation becomes a destination table. It does not copy the source table's physical partitioning configuration, partition key, or partition bounds to BigQuery.
With publish_via_partition_root = true, truncating an individual leaf partition is not replicated as a truncate event for the published parent. This is useful for append-only data such as events: you can truncate old leaf partitions to keep Postgres storage bounded while retaining the rows already copied to the destination. If you want the destination to be truncated too, run TRUNCATE on the published partition root.
Rows retained only in the destination aren't a permanent archive. A table reset or full pipeline initial sync rebuilds the destination from the rows that still exist in Postgres.
Viewing publications in the Dashboard#
After creating a publication via SQL, you can view it in the Dashboard:
- Navigate to the Database > Publications section of the Dashboard
- You'll see all your publications listed with their tables
Step 2: Enable Pipelines#
Before creating a managed replication pipeline, enable Pipelines for your project:
- Navigate to the Database > Replication section of the Dashboard
- Click Add destination to show the replication side panel
- Select a Pipelines destination, such as BigQuery
- Click Enable Pipelines
Step 3: Configure a destination#
Once Pipelines is enabled and you have a Postgres publication, configure a destination. The destination is where your replicated data will be stored, while the pipeline is the active Postgres replication process that continuously streams changes from your database to that destination.
Choose and configure your destination#
Follow these steps to configure your destination. Each destination has its own setup requirements and behavior. BigQuery is currently available. You can request early access to ClickHouse, Snowflake, and DuckLake.
-
Navigate to the Database > Replication section of the Dashboard
-
Click Add destination if the destination side panel isn't already open
-
Select the destination type
-
Configure the destination details:
- Destination name: A name to identify this destination
- Publication: Select an existing publication, or click New publication to create one by choosing a name and at least one table
- Region: Managed Pipelines run in the fixed AWS
eu-central-1(Frankfurt) region. This can't be changed. In your destination provider, choose a nearby dataset, warehouse, or storage bucket region.
-
Configure the destination-specific settings. See the destination guide for required credentials, permissions, and limitations:
-
Optionally expand Advanced settings to tune pipeline behavior:
Setting Default Allowed values Description Batch wait time 10000millisecondsWhole milliseconds, 0or greaterMaximum time after the first buffered initial-sync row or ongoing change before the pipeline flushes a partially filled batch. Internal size and memory limits can flush it earlier. Lower values can reduce batching delay; higher values can improve destination write efficiency. Table sync workers 4workersWhole number greater than 0Maximum number of tables synced in parallel during the initial sync. Each active table sync temporarily uses one additional replication slot, up to N + 1slots including the pipeline's main slot.Copy connections per table 4connectionsWhole number greater than 0Maximum source database connections used to copy one table in parallel. With multiple table sync workers, source connection usage can scale with both settings. More connections can speed up large tables until the source database, network, or destination becomes the bottleneck. Invalidated slot behavior ErrorErrororRecreateWhat happens when the main replication slot can no longer continue from retained WAL. Error blocks startup for manual recovery. Recreate resets table sync state, rebuilds the slot on the next start, and runs the initial sync again for every replicated table. Leave these settings at their defaults unless you need to tune initial sync speed, latency, or recovery behavior.
Use Invalidated slot behavior carefully. If Recreate is selected and the pipeline starts after Postgres has invalidated the main replication slot, the pipeline resets its saved table-sync state, creates a new slot, and replaces each destination table through a new initial sync. This destructive restart is required for consistency because the old slot can no longer provide every change the pipeline missed, and the new initial sync is billed as initial sync data.
-
Click Create and start pipeline to begin replication
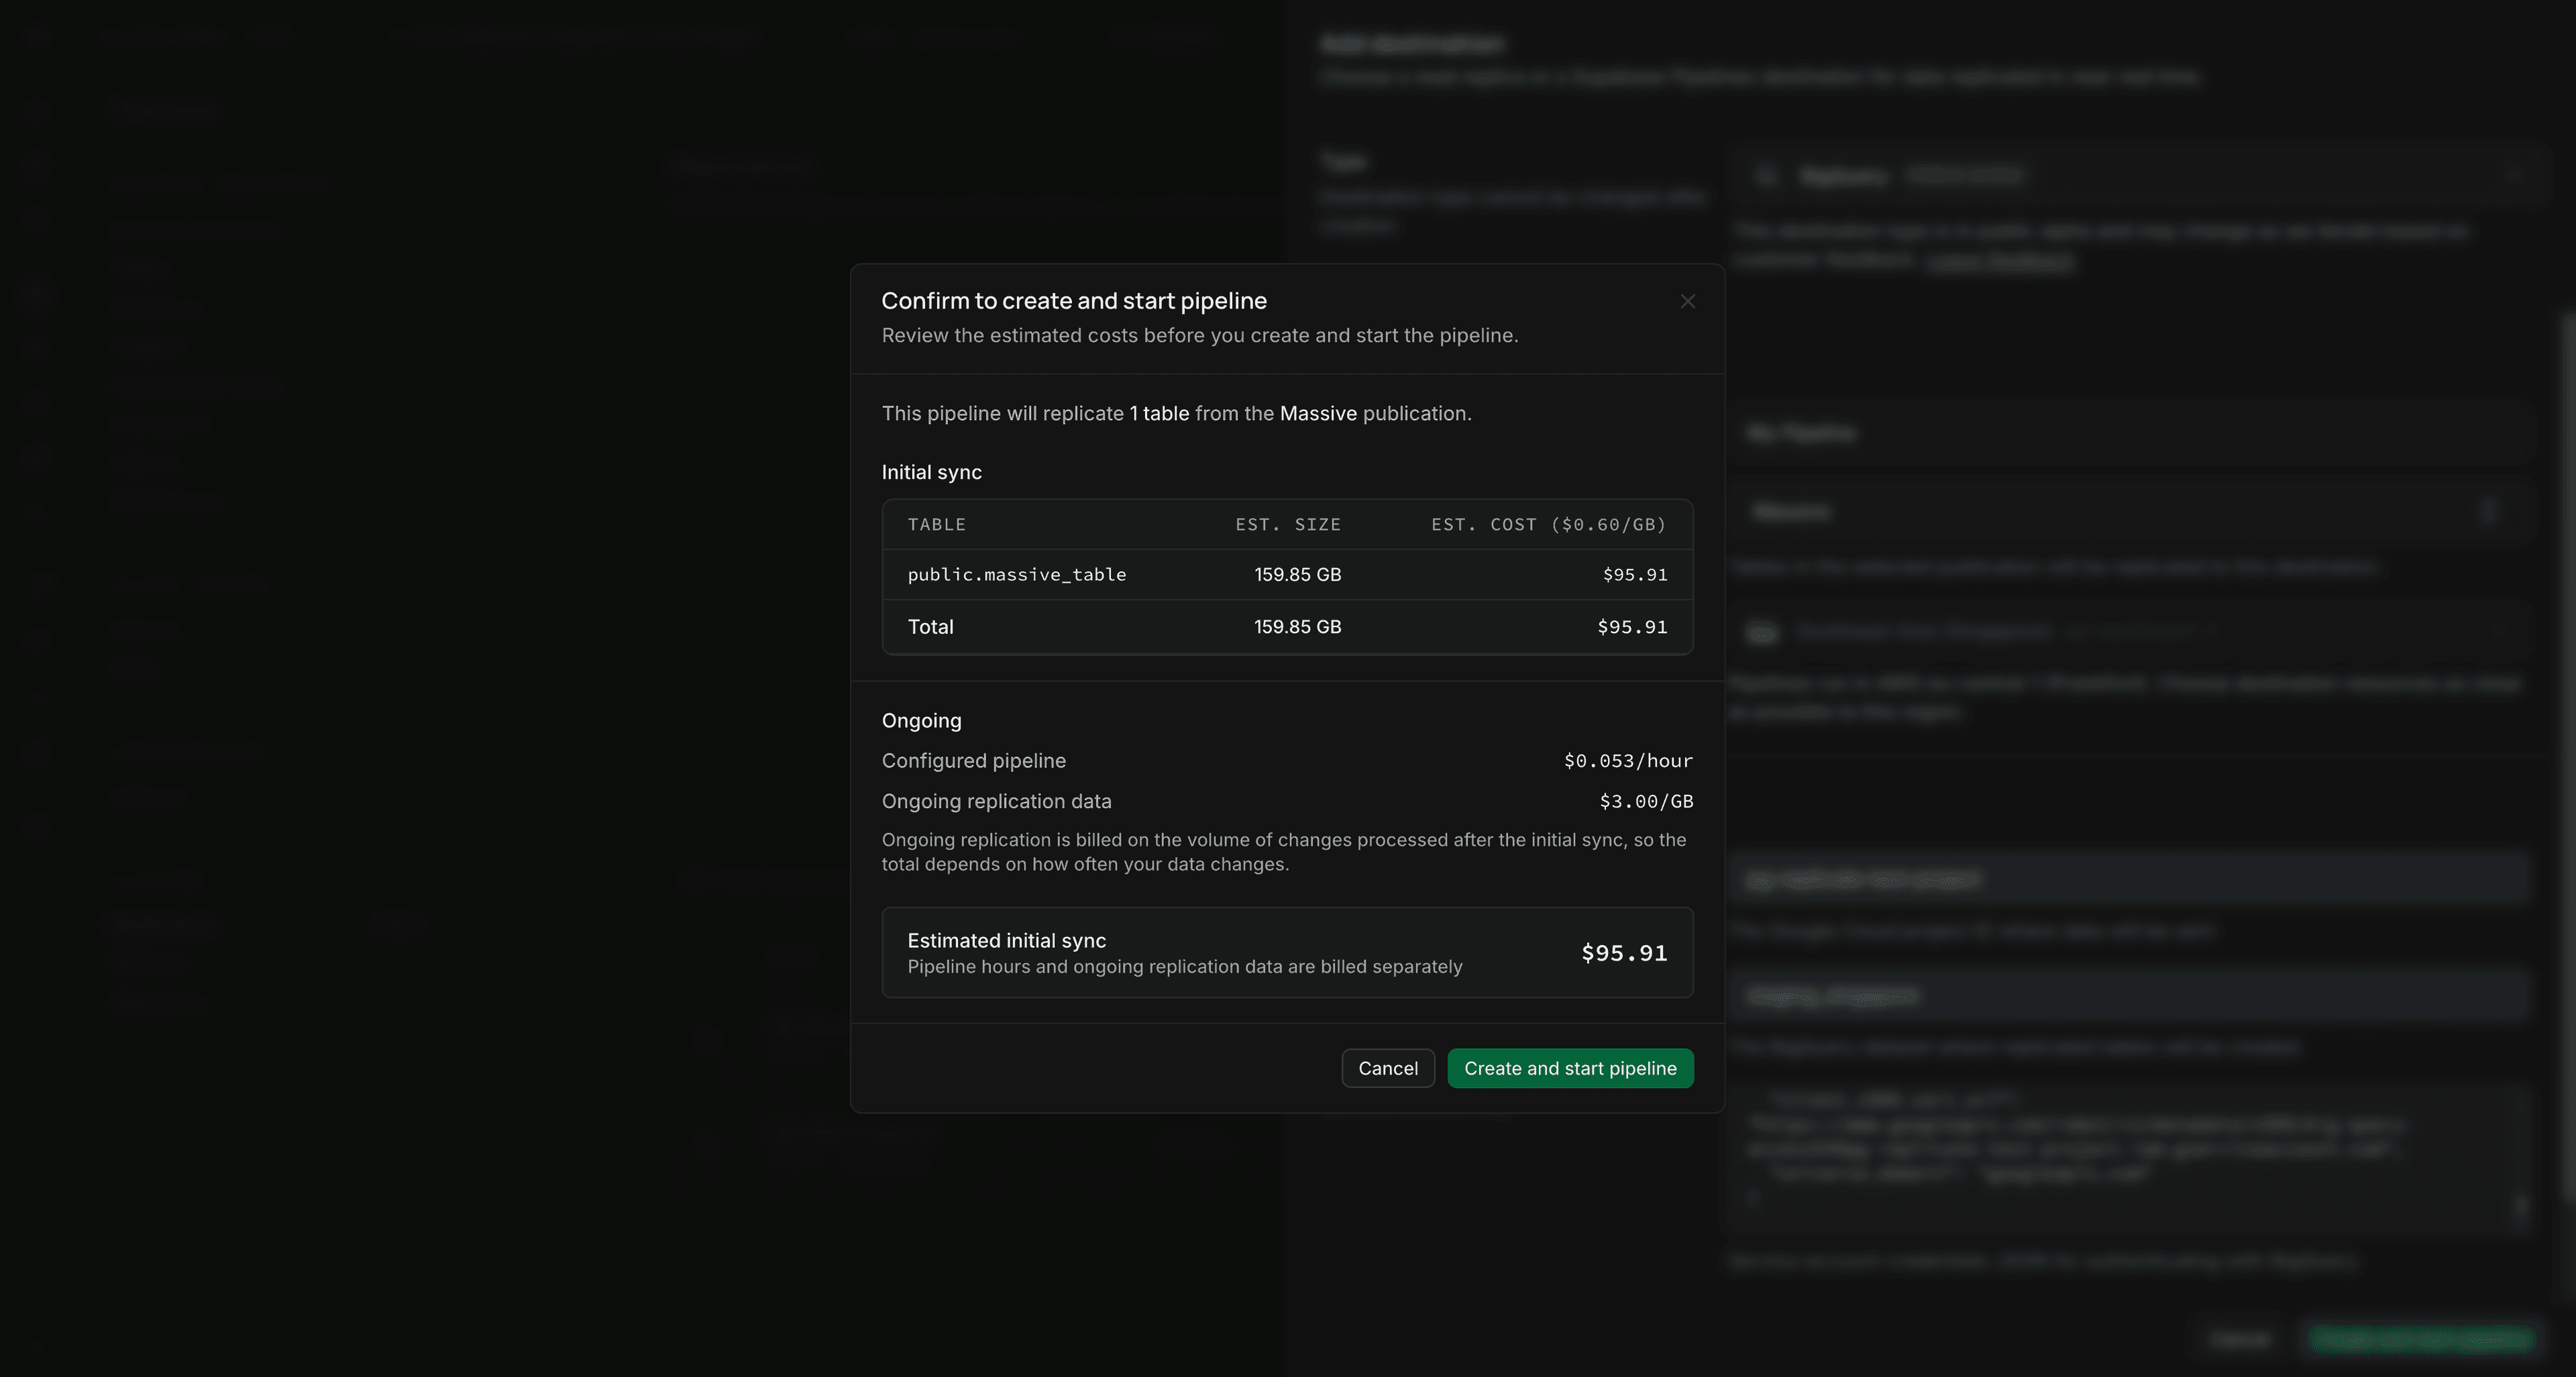
The pipeline begins the initial sync from your database to your destination.
Step 4: Monitor your pipeline#
After you create and start the pipeline, its destination appears in the destinations list. You can monitor the pipeline's status and performance from the Dashboard.
For comprehensive monitoring instructions including pipeline states, metrics, and logs, see Monitor pipeline status.
Managing your pipeline#
You can manage your pipeline from the destinations list using the actions menu.
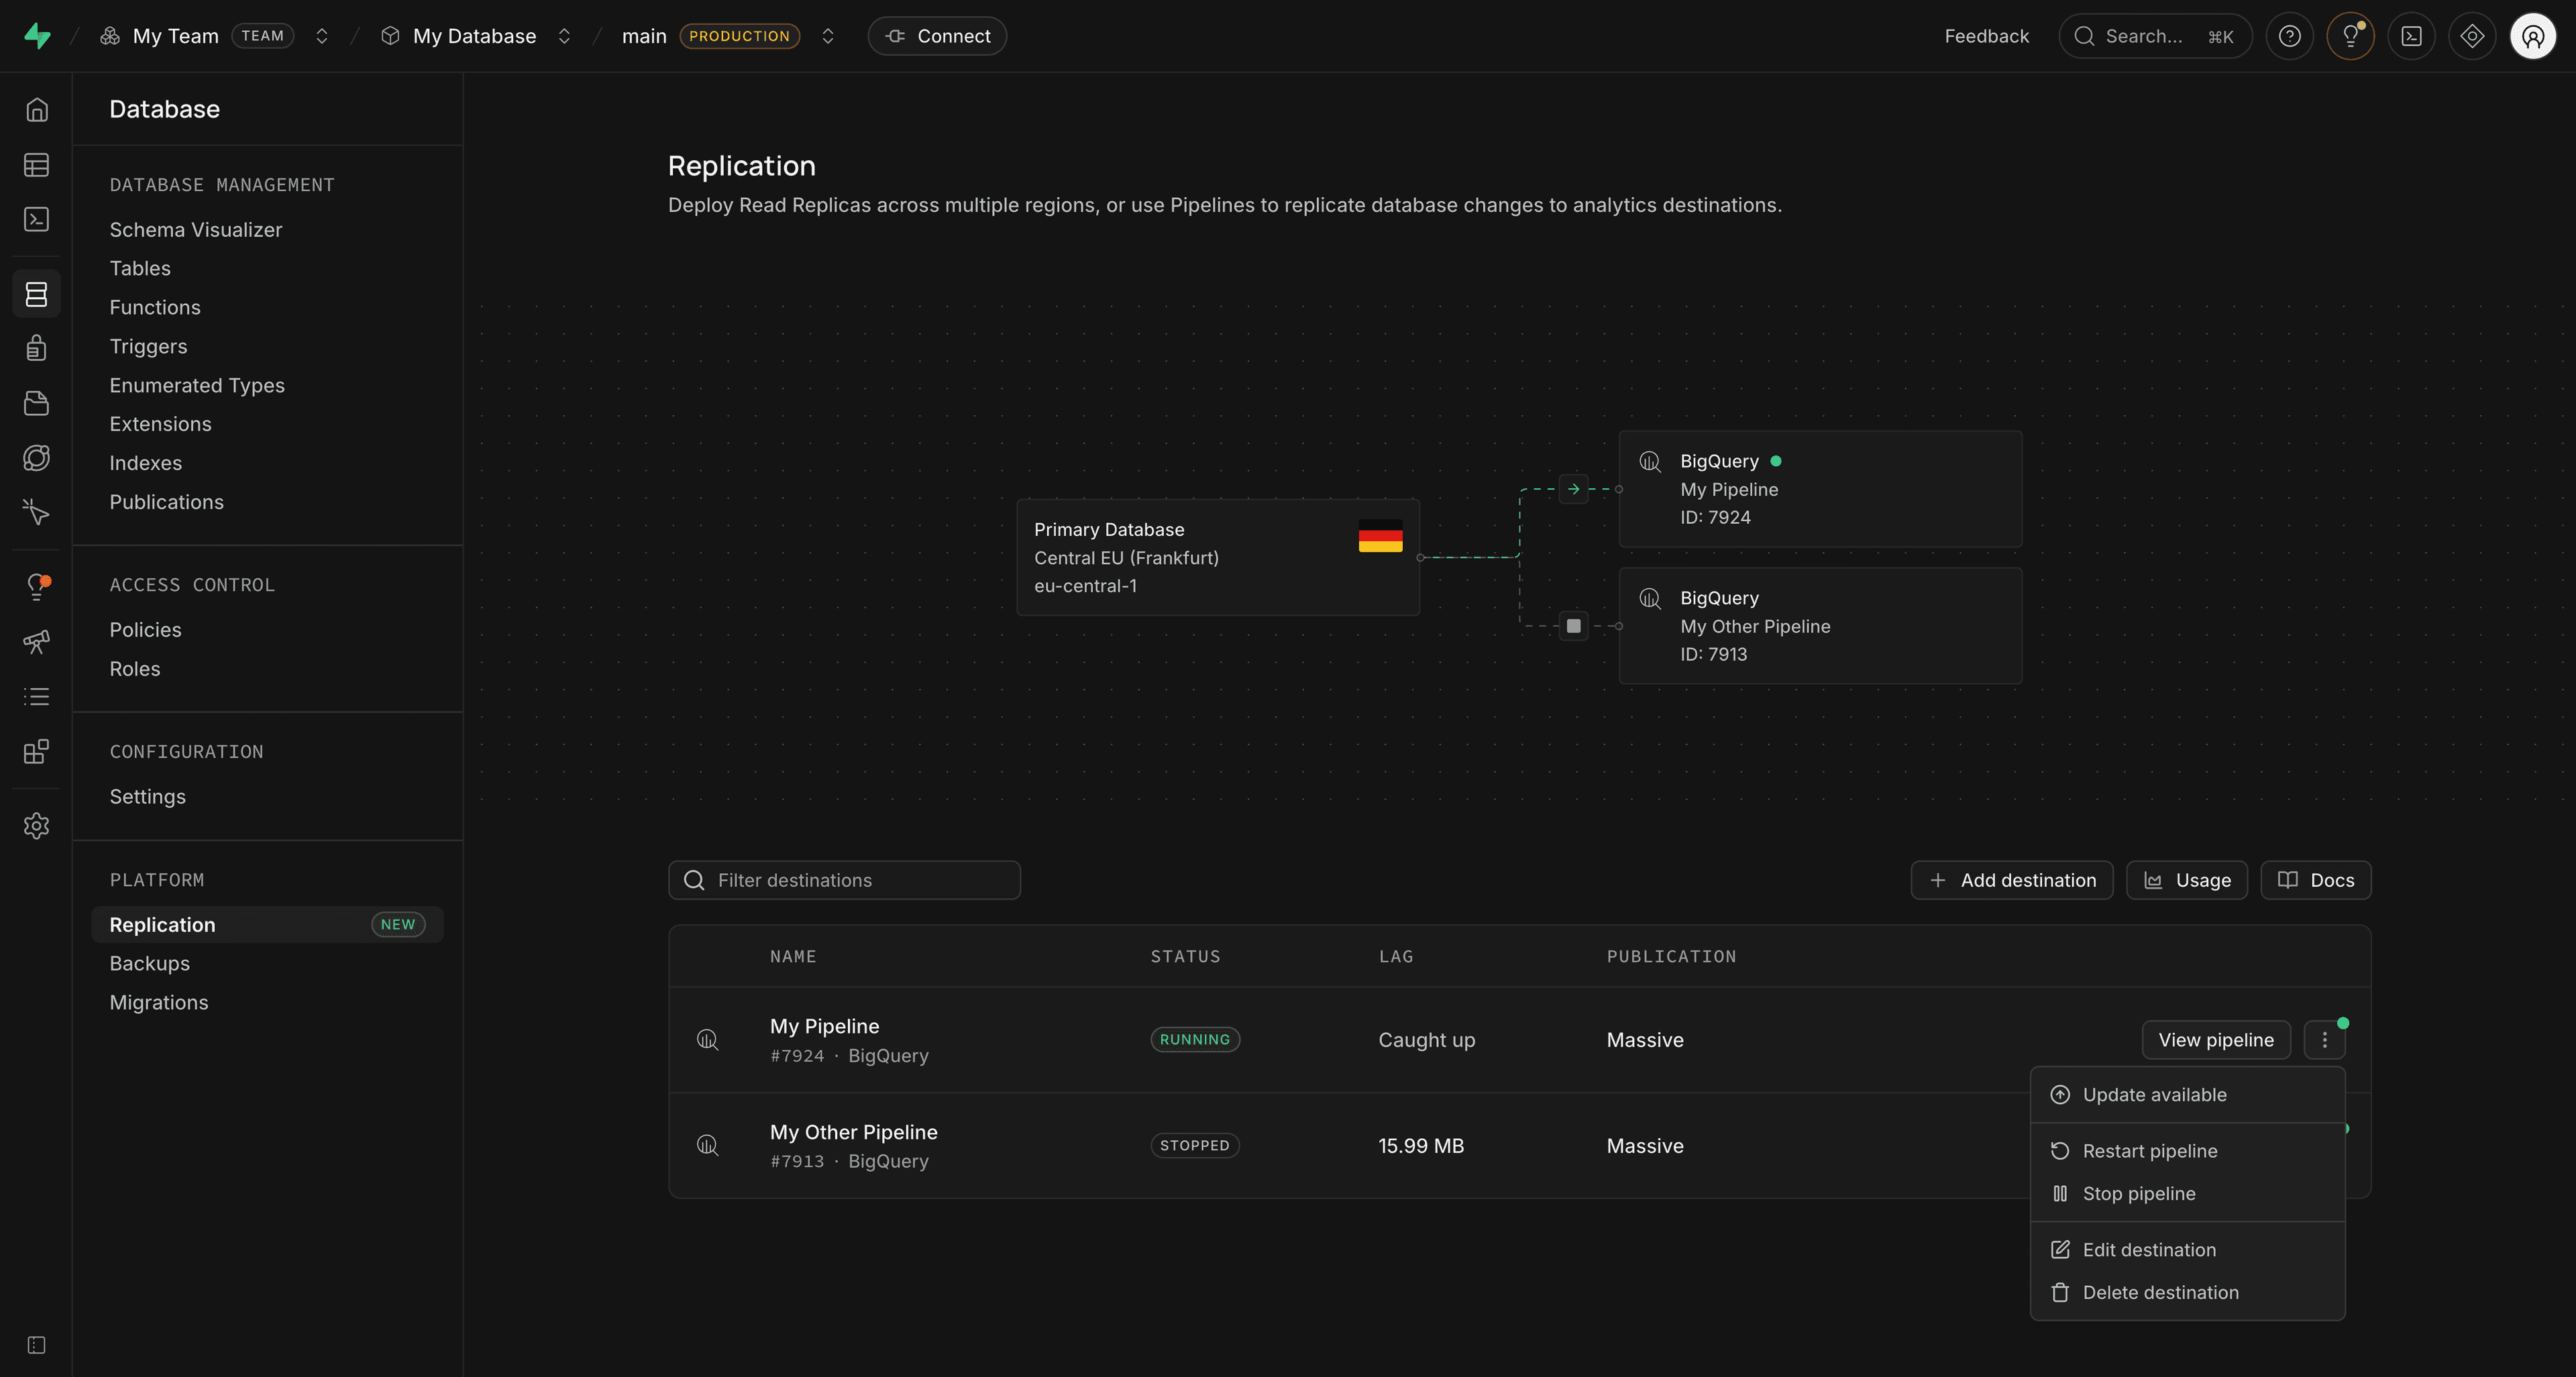
Available actions:
- Start pipeline: Begin replication for a stopped pipeline
- Update available: Review and apply the latest managed pipeline version when an update is available
- Stop pipeline: Request a graceful stop. The pipeline can remain Stopping for up to five minutes while in-flight work finishes. New changes queue in the WAL, and configured pipeline-hour billing continues while stopped.
- Restart pipeline: Stop and start the pipeline (required after publication changes)
- Edit destination: Modify destination settings like credentials or advanced options
- Delete destination: Remove the destination and permanently stop replication
Disabling Pipelines#
To turn off Pipelines for a project, delete all Pipelines destinations first. After all destinations are removed, open the three-dot actions menu on the Replication page and click Disable Pipelines.
For cleanup details, see What happens when you disable Pipelines?.
Adding or removing tables#
If you need to modify which tables are replicated after your replication pipeline is already running, follow these steps:
If your Postgres publication uses FOR ALL TABLES or FOR TABLES IN SCHEMA, new tables in that scope are automatically included in the publication. However, you still must restart the replication pipeline for the changes to take effect.
Adding tables to replication#
-
Add the table to your publication using SQL:
1-- Add a single table to an existing publication2alter publication pub_users_orders add table products;34-- Or add multiple tables at once5alter publication pub_users_orders add table products, categories; -
Restart the replication pipeline using the actions menu (see Managing your pipeline) for the changes to take effect.
Removing tables from replication#
-
Remove the table from your Postgres publication using SQL:
1-- Remove a single table from a publication2alter publication pub_users_orders drop table orders;34-- Or remove multiple tables at once5alter publication pub_users_orders drop table orders, products; -
Restart the replication pipeline using the actions menu (see Managing your pipeline) for the changes to take effect.
When a table is deleted at the destination, the behavior depends on the destination. In general, the pipeline tries to recreate the table so replication can continue. To permanently delete a table, stop the pipeline first or remove it from the publication before deleting. See the Pipelines FAQ for details.
Schema change support#
Schema change support depends on the destination. BigQuery is currently the only destination with beta schema change support. See BigQuery schema change support for supported and unsupported changes.
How it works#
Once configured, a replication pipeline:
- Captures changes from your Postgres database using Postgres publications and logical replication
- Sends the changes through the managed pipeline
- Loads the data to your destination
Pipelines automatically optimizes how changes are delivered to the destination. It maps published source columns and values to destination-compatible names and types, but doesn't provide user-defined transformations.
Troubleshooting#
If you encounter issues during setup:
- Publication not appearing: Ensure you created the Postgres publication via SQL and refresh the dashboard
- Tables not showing in publication: Verify your tables meet the requirements of the selected destination. BigQuery requires a source primary key and requires the publication to include its columns.
- Pipeline failed to start: Check the error message in the status view for specific details
- No data being replicated: Verify your Postgres publication includes the correct tables and event types
For more troubleshooting help, see the Pipelines FAQ.
Limitations#
Pipelines has the following limitations:
- Primary keys: Requirements are destination-specific. Postgres can publish inserts for a table without a primary key, but BigQuery Pipelines always requires a source primary key and requires the publication to include its columns.
- Custom data types: Custom values replicate as strings. Check that your destination can interpret those string values correctly.
- Generated columns: Generated columns are skipped. Use triggers to store derived values in regular columns if you need them in the destination.
- Replica identity: Requirements are destination-specific. Updates and deletes need enough row identity to apply safely. See BigQuery source table requirements for the supported modes.
- Schema changes: Currently in beta and limited to BigQuery
- No user-defined transformations: Pipelines performs destination-compatible type and name mapping, but doesn't run custom transformations
- At-least-once processing: A retry, restart, or interruption can cause a batch to be processed again. BigQuery uses primary-key-based CDC to converge on the current table state. See Can data be processed more than once? for details.
Destination-specific limitations, such as BigQuery's row size limits, are documented in each destination guide.